
 Published on August 11, 2025 by

Key Takeaways
- Refinishing hardwood floors restores their appearance and durability at a lower cost and with less waste than replacement, while feathering blends new boards into old ones for seamless repairs.
- Common refinishing mistakes like poor sanding, improper cleaning, or thick finish coats can ruin results, but proper preparation and technique ensure a smooth, long-lasting finish.
- On Point Contracting uses expert sanding, correct grit sequences, and precision feathering to deliver flawless, durable hardwood floors without visible seams or costly redos.
What Happens During Hardwood Floor Refinishing
Hardwood floor refinishing is the process of restoring the look and durability of an existing hardwood floor. It removes scratches, dents, and worn spots before adding a protective finish. This process can make old wood floors look brand new and help them last for decades.

Many homeowners choose to refinish hardwood floors instead of replacing them because it is more cost-effective and preserves the original character of the flooring.
The process begins with using a sanding machine to strip away the old finish until the bare wood is exposed. Damaged spots are repaired, and small gaps are filled for a smooth surface. The floor is then cleaned and a stain or sealant is applied, sometimes with a paint brush for detail work, to create an even, durable new coat.
Depending on the square footage, the work may take a few days, and protective gear like a dust mask is often used during sanding. Proper refinishing extends the life of your floors and keeps them looking their best.
Hardwood Floor Refinishing vs. Replacement: Which Saves You More Money?
Hardwood floor refinishing often saves more money than a full replacement, but the best choice depends on several key factors. Refinishing is less costly because it reuses your existing flooring and focuses on labor and surface restoration.
Replacement adds the cost of new materials, removal, and installation, which can more than double the overall price. When comparing refinishing hardwood floors to replacing them, it helps to look at specific parameters that influence both cost and value.
Here are the main ones and why they matter:
- Cost. Determines the upfront investment and affordability for your budget.
- Lifespan Impact. Shows how long the result will last before major work is needed again.
- Time Required. Affects how long your home will be disrupted during the project.
- Material Waste. Impacts environmental footprint and disposal costs.
- Appearance Options. Influences how much you can change the style, color, and overall look.
- Environmental Impact. Reflects sustainability and resource use over the project’s lifecycle.
| Parameter | Refinishing Hardwood Floor | Replacing Hardwood Floor |
|---|---|---|
| Cost | Lower. Average $3–$8 per square foot | Higher. Average $8–$15+ per square foot |
| Lifespan Impact | Extends existing floor life by 10–15 years | New floor can last 30–50 years |
| Time Required | 2–5 days depending on square footage | 1–2 weeks including removal and installation |
| Material Waste | Minimal. Reuses existing wood floors | High. Old floors removed and discarded |
| Appearance Options | Can change stain color or finish | Complete style change with different wood type |
| Environmental Impact | Lower. Less waste and fewer new resources used | Higher. Requires new hardwood production |
The 5 Most Common Hardwood Floor Refinishing Mistakes
Hardwood floor refinishing can make your floors look brand new, but even small mistakes can ruin the result and cost more to fix. Many of these errors come from poor preparation, rushing the process, or using the wrong tools. Knowing what to watch for helps us get a smoother job, protect your wood floors, and achieve a finish that lasts.
Here are the five most common mistakes, why they matter, and how to avoid them:
- Skipping Proper Sanding. Uneven sanding leaves swirl marks and prevents stain from soaking in evenly. Using a sanding machine for the main area and hand sanding edges and corners ensures no old finish remains.
Solution. Sand in multiple passes using the correct grit progression until we reach bare wood. We check under strong lighting before moving to the next step.
- Not Cleaning Between Steps. Dust and debris left on the wood floor before staining or sealing can cause rough patches and dull spots.
Solution. Vacuum the entire surface thoroughly and wipe with a tack cloth between each stage so the finish adheres properly and stays smooth.
- Using the Wrong Grit. Starting with grit that is too fine will not remove the old finish, while one that is too coarse can scratch the bare wood.
Solution. Follow a proper grit sequence that matches the condition of the floor. For larger square footage, we plan grit changes ahead to save time and effort.
- Applying Thick Coats of Finish. Heavy coats take longer to dry, can trap bubbles, and often peel.
Solution. We apply thin, even layers with a paint brush for edges and a floor applicator for larger sections. We allow each coat to dry fully before adding the next to achieve a strong, even finish.
- Ignoring Safety Gear. Breathing fine dust without a dust mask can cause serious health problems. Eye and ear protection are just as important when using power tools.
Solution. Always wear a dust mask, safety glasses, and hearing protection throughout the job to stay safe and focused.
At On Point Contracting, we avoid these mistakes entirely because we have the experience, tools, and proven process to refinish hardwood floors the right way. We deliver even, flawless coats and lasting durability, so you can enjoy beautiful wood floors without the stress, mess, or costly re-dos.
How to Prepare Your Home for Hardwood Floor Refinishing
Preparing your home for hardwood floor refinishing makes the job faster, cleaner, and ensures the best results. A solid prep plan reduces the risk of dust damage, protects your belongings, and creates a clear, open space for the work. The more organized the home is before the process begins, the smoother and cleaner the outcome will be.
Here are the key steps to prepare your home before you refinish hardwood floors:
- Clear All Furniture and Rugs. Move every item off the floors, including small decor pieces, so the entire surface can be sanded and finished without obstruction.
- Protect Wall Hangings and Electronics. Remove or cover artwork, TVs, and speakers to prevent dust buildup. Even with dust control systems, fine particles can travel.
- Seal Off Other Rooms. Use plastic sheeting and painter’s tape to block doorways and vents. This helps stop dust from spreading through the rest of the home.
- Plan for Limited Access. Once sanding begins, the floors cannot be walked on until the new coat is fully dry. Arrange alternative entry points or temporary relocation if needed.
- Check for Repairs. Identify squeaky boards, loose planks, or gaps so they can be fixed during the refinishing process.
- Control Indoor Climate. Keep temperature and humidity stable to help finishes dry evenly and prevent wood floors from expanding or shrinking.
Proper preparation not only speeds up the job but also ensures a cleaner workspace and a longer-lasting finish on your hardwood floor.
What Is Floor Feathering and Why It Matters for Hardwood Repairs
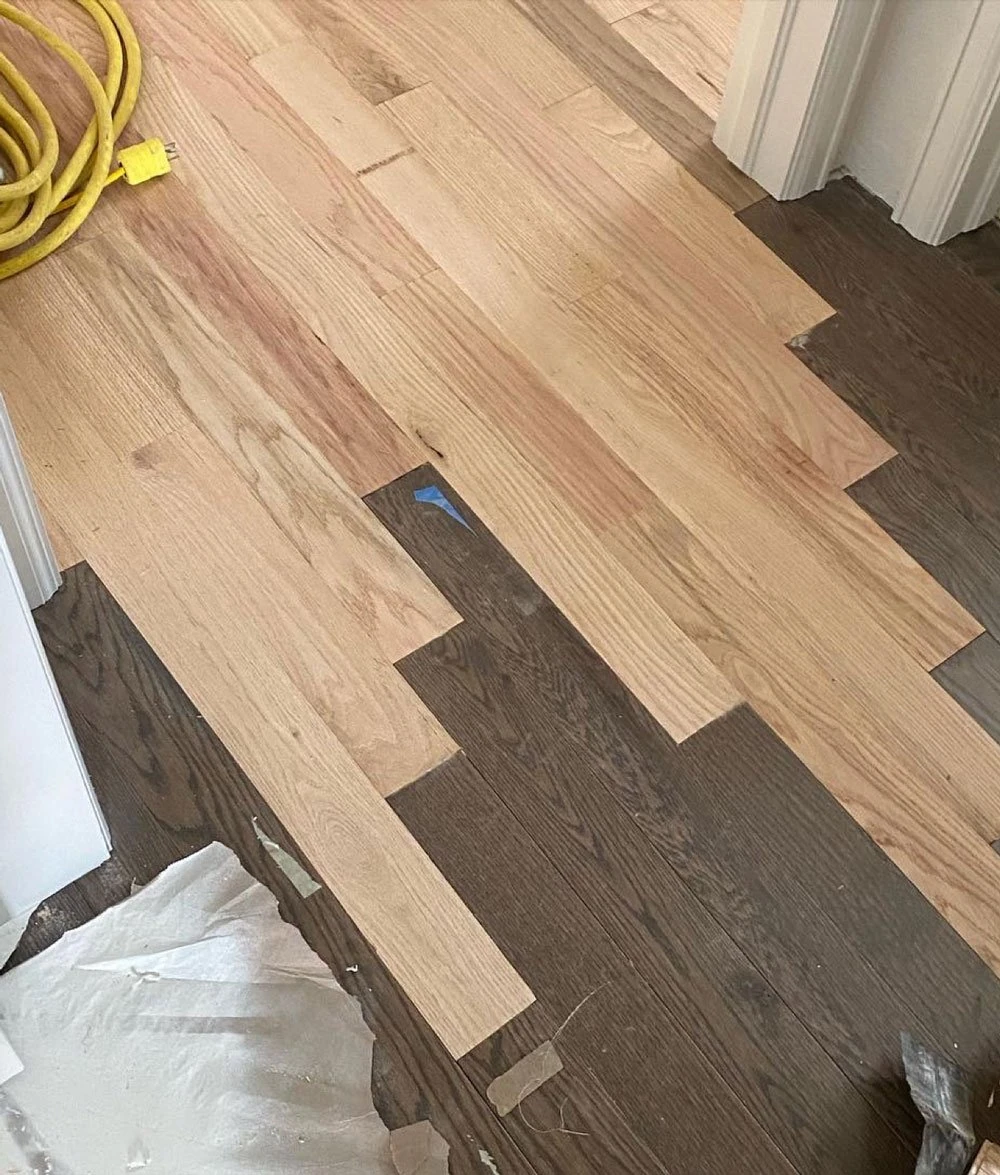
Floor feathering is a repair technique used to blend new hardwood boards into existing flooring so the transition is smooth and natural. Instead of replacing a large section, we stagger and mix the new boards into the old ones, matching the wood type, grain, and finish. This approach avoids obvious patch lines and keeps the floor looking uniform.
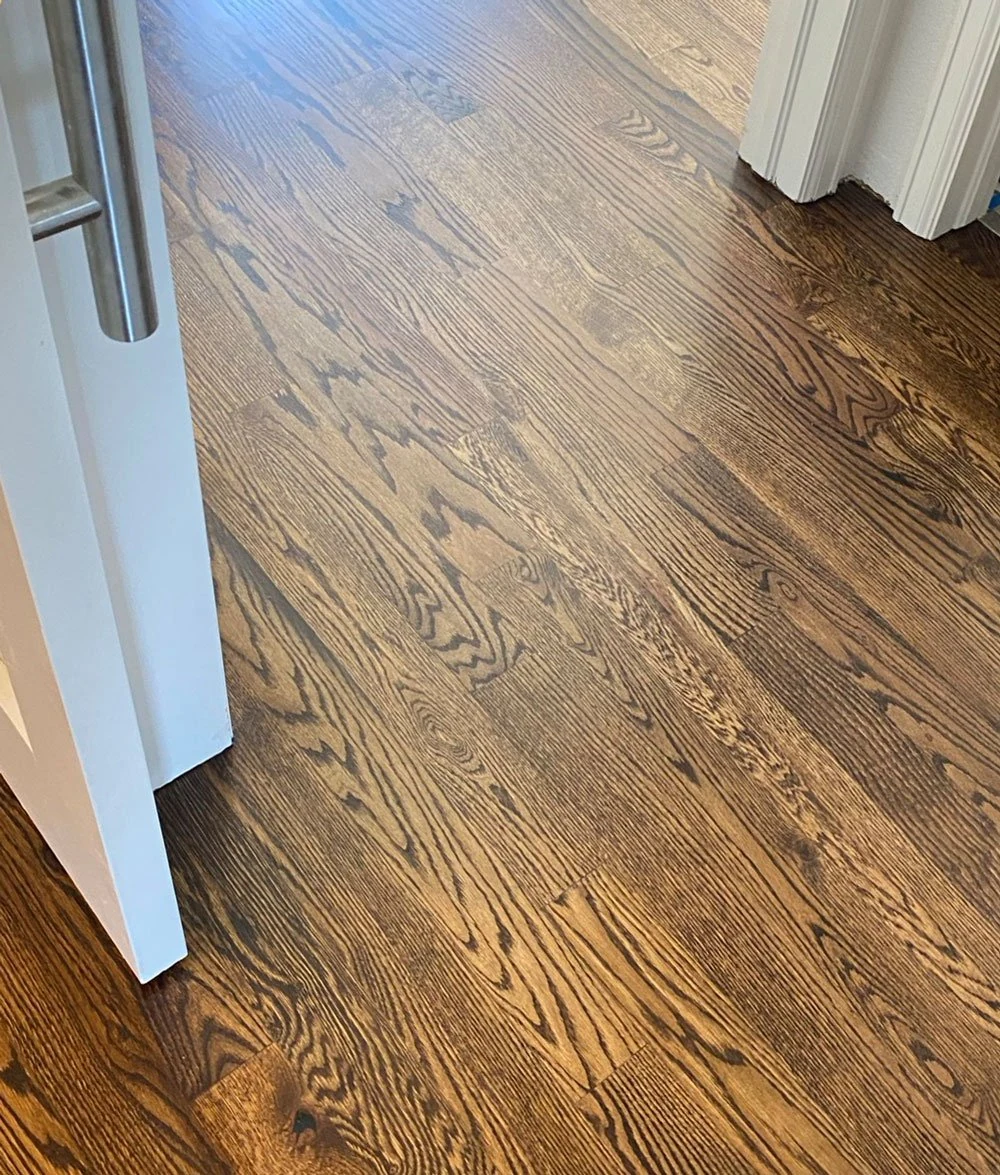
Feathering matters because hardwood repairs are most noticeable when the repaired area has straight, abrupt edges. By staggering board ends and aligning the grain, feathering hides where the old floor meets the new.
It also helps maintain the structural flow of the floor, reduces the amount of wood waste, and prepares the repaired section for seamless sanding and refinishing. Without proper feathering, even a well-finished repair can stand out and reduce the visual appeal of the entire room.
When Do You Need to Do Floor Feathering?
You need to do floor feathering when new hardwood boards must be blended into an existing floor so the repair is invisible. It is most common when part of the floor is damaged, removed, or replaced, and you want the new boards to match in both pattern and flow. Instead of a hard line where the new wood starts, feathering creates a gradual transition that looks natural after refinishing.
Typical situations that call for floor feathering include:
- Repairing Water or Pet Damage. When part of the floor has warped, stained, or rotted.
- Replacing Boards After Remodeling. When walls are removed or layouts change, leaving gaps in the wood floor.
- Patching Wear-Prone Areas. In high-traffic spots where boards have worn thin or cracked.
- Blending New Wood Types. When adding boards of similar but not identical grain or tone to existing wood floors.
- Expanding Flooring Into New Spaces. When continuing wood floors from one room into another and needing a seamless look.
Using floor feathering in these cases ensures the repair blends perfectly and allows the entire surface to be sanded and refinished as one smooth, unified floor.
Can You Feather New Wood into Prefinished Floors?
Yes, you can feather new wood into prefinished floors, but it takes more precision than working with unfinished hardwood. Prefinished boards already have a factory-applied stain and coating, so matching the color, gloss, and texture is essential. The new boards need to blend naturally with the old ones, even without sanding the entire surface.
The biggest challenge is getting the match right so the repair does not stand out. Prefinished flooring can vary in tone and shine, and the edges where old meets new must be carefully sealed to prevent moisture damage. While feathering can make repairs almost invisible, some homeowners still choose to sand and refinish the whole floor afterward for a seamless look.
Seamless Hardwood Floor Repairs That Look Original
Scratches, dents, or damaged boards can make beautiful hardwood floors look tired. Refinishing and using feathering repairs restores their original beauty while avoiding the cost of a full replacement. This process removes flaws, blends in new boards without visible seams, and extends the life of your flooring for years.
At On Point Contracting, we handle every step the right way. We avoid the common refinishing mistakes that cause uneven color, rough patches, or peeling finish. Our team uses precision sanding, proper grit sequences, and detailed feathering so your repairs disappear into the surrounding boards. You get a flawless, durable finish without the stress, wasted time, or costly redos.
Next steps:
- Inspect your floors to identify areas with scratches, worn finish, or board damage that may need refinishing or feathering.
- Prepare your home by clearing furniture, sealing off other rooms, and addressing any squeaky or loose boards before work begins.
- Contact On Point Contracting to schedule a professional assessment and get a plan for seamless, lasting hardwood floor repairs.
Bring your floors back to life and enjoy the smooth, unified look only expert refinishing and feathering can deliver.


